Make Your Own Big Magnetic Staff Board
I’ve always wanted one of those big magnetic white boards with a music staff. They are expensive, however, so for years I’ve been planning on making my own. Recently my daughter moved and gave me an almost brand new 3’x 2′ magnetic board!
I’ve been using the magnetic board at every lesson to teach how to place sharps and flats on the staff in order to construct key signatures. All of my students have said it is so much easier to learn them this way. It’s also a great way to show beginners stem direction, and even learn note names. It is a lot faster and more fun than using a worksheet, too. This has been so helpful in my studio that I can’t imagine why I waited so long to actually make it!
I thought about using a marker to draw the staff lines on my board, but I was afraid I would mess it up. Instead I decided to use 1/4″ art tape, also called drafting tape or artist tape. I think wider tape looks too big for the size of my notes. I wanted my lines to be about the size of a line I would draw on the board, if I had steady hands!
Magnetic white boards are a lot more expensive than the non-magnetic variety. The most expensive places are office supply stores. Sometimes Amazon has great buys, but be sure to buy the magnetic variety if you mail order one. If it doesn’t specifically say it is magnetic, it is not. Here are some suggestions to get one at the best price:
- Use a 40% coupon at Michaels or Hobby Lobby.
- Check out Sam’s or Cosco.
- Buy a giant size oil changing pan at Walmart and spray paint it white. This is the real do-it-yourself method, because the big pans are under $15.00. (Make sure it is magnetic.)
If it is important to you that the symbols are “see through” just like notes on a page, BEFORE laminating anything cut out the inside white part of each symbol.
Material
- Ready made magnetic white board about 3′ x 2″
- Or a large metal oil pan and white spray paint, if you make your own board
- 1/4″ black art tape
- Heavy Paper or card stock
- Scissors
- Small scissors and/or craft knife
- Template for lines
- Thermal laminator and lamination pouches (film)
- Magnetic tape
- Tiny bit of glue
- Sharpie for touch ups
- Ruler
Instructions
Print the symbol pages with black ink and cut out each symbol. Cut out the inside of each symbol with small scissors so that there is no white showing. I cut a slit with a craft knife before I cut the inside but that is optional. Use a black sharpie along the edges if needed to cover up little bits of white.
Use your whole note as a measure to determine the size of your staff. My staff lines are 1 1/2″ from the top of the tape line to the top of the next tape line, but you should measure your printed notes and make the lines to fit. With a ruler make a template to show the placement of the tape.
Line up the template where you want to put the lines for the staff. Cut tape the length of your white board and place 5 lines horizontally on the board. In this photo, you can see I discovered the staff is too close to the edge for high ledger lines notes, so I plan to move it down. Originally I was going to make a grand staff. 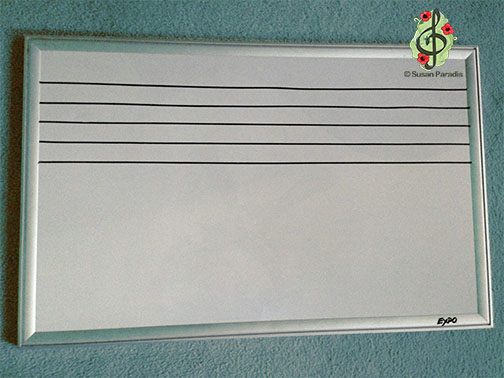
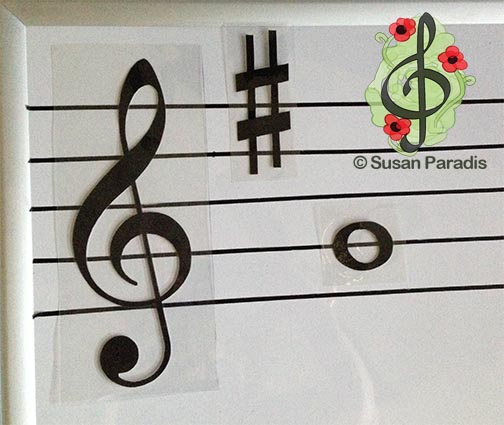
Place the cut symbols and notes into lamination pouches. Leave enough room around each symbol so that they can be cut in rectangles and squares for ease in handling.
The Bass Clef
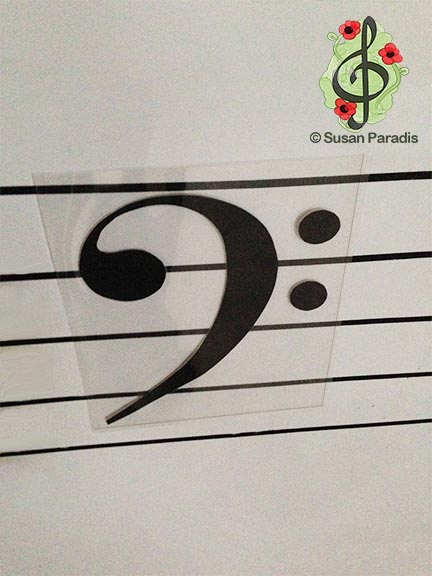
The dots on the bass clef should be cut out separately. Place the cut out bass clef (without the dots) inside the laminating pouch and lay it over your template. Open the pouch. Put a little bit of glue on a toothpick to glue the dots in the correct place on the laminating pouch. The dots will need to be centered on each side of the bass F line. The glue will hold the dots in place. Then close the laminating pouch and run it through the laminator. This worked great for me and was not as hard as it sounds. Now the dots are “floating” beside the clef. My students keep asking me how I did it!
Cut small pieces of magnetic tape and place it on the back of each symbol. Well, it wouldn’t be a Magnetic Board without magnets! 🙂 Trim the tape as needed to fit the symbol. Every symbol needs at least 2 pieces of magnetic tape and the bigger symbols need more.
To conclude, it was not hard to make my magnetic staff board and symbols. In fact it was a lot easier than writing this post which took me about a week! I find it hard to write directions, so please leave a comment if you have a question about the instructions or even a suggestion! If you have made a magnetic board with an oil pan, give us some tips!


Hello Susan,
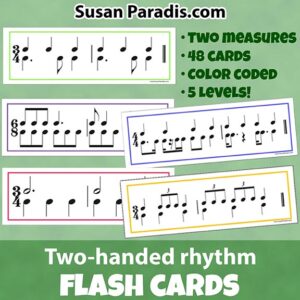
I would like to know if you have rhythm notes available in PDF to print out. I really enjoyed reading your post and will be making a magnetic board using magnetic paint for my wife’s studio this week. Looks like a fantastic idea using the laminate. My wife Angela was looking to do something similar and I’ll be painting a large wall in her piano room for the staff.
Thanks, Scott.
Thank you, thank you! This is absolutely awesome and right on time, as I plan to do a lot of staff work this term.
Much appreciated!
Thank you for the idea!
I actually going to buy a pre cut music staff from Teacher’s choice and “paste” them on magnetic sheets ( they are sold on dollar stores as a picture frames) and cut them out.
But you idea is terrific because I can customize the size!!!!
Thank you!
I would like new printables, too! This is great! Exactly what I was looking for!
Thank you so much for this! I just finished the project and it looks great. I went ahead and did a grand staff with a C line between and there is still plenty of room on top and on bottom if I want to eventually add up to high C and low C. I would *love* more printables like time signature, bar lines, rhythm groups, if you are up for doing that!
This was great! Thank you so much. I already had the magnetic board, so I made the notes and symbols and they look great! And yes, I would love to have time signatures, bar lines, etc. Using the magnets is quicker that having the students draw everything. Of course, at times, drawing is necessary, but other times it helps to be able to cover more material. Thanks, Susan, for all you do!
I really like this idea. I recently made a magnetic board out of a small cookie pan from Dollar Tree. I use it with a paper grand staff and I made little letter pieces from the little flat, clear marbles you can buy also at Dollar Tree. I imagine you could spray paint the cookie sheet white and use tape on it for your laminated cutouts. I might give it a try. I guess you could do it without spray painting the pan also.
I know how hard it is to write instruction. I am also a paper crafter with Stampin’ Up! and writing instruction for making some of my projects is very difficult to make it clear and concise. You do a great job!
Susan, this has really inspired me. What great ideas you have. Can I just make another suggestion though? It’s possible to buy magnetic primer paint which you can then paint over in whatever colour you like. In this case you would only need a large board – or even the wall! Put on several coats of the grey primer (you need to build up several layers to make sure it is magnetic enough), then paint over it in white and go from there.
This project is going on my to-do list. Love the suggestions in the comments as well — I have a Cricut machine and a music cartridge so it might be just perfect as one person suggested!
Your blog was the first “piano teaching” blog I added to my reading list and still is my favorite and one of the most practical. I love your resources and the way you make them accessible to everyone. Thanks for sharing!
I made a large magnetic staff board for my students several years ago and it was very popular. I didn’t have any instruction so made it up as I went along.
The black tape is a good idea as I found that the felt marker lines rubber off as I moved the symbols around. I didn’t cut out the clefs entirely and added the black lines before laminating as they are always on the same place on the staff I glued on some craft foam before adding the magnetic tape so that they were proud on the board. It made it much easier for wee fingers (and mine) to use the notes etc. I absolutely love your work and dedication to teaching piano, and also a big hullo from New Zealand
On a “smaller” scale – Use the smaller boards from Walmart for individual student boards. They are only about $7. I have 12 that I hand out to my students as individual boards. I use the black roll magnets (Walmart $6) for the perfect size note. Do ABC games, intervals, scales. Use stickers to put on silly designs or Alphabet letters on the magnets or you can write on them with a white painter’s pen. The black tape makes the perfect staff . 🙂
Wow! Great stuff! Hoping to get started with this soon. Thank you! Your work on the site has always been SO helpful. Thanks again
Thank you! Many years ago (over 30) I cut out symbols to use on my poster board staff board (grand staff on one side, larger single staff on the other) and they are truly showing wear!! I will be making a magnetic board and will use transparencies for my printer and then put magnets on the back when I cut them out. Then I won’t need to cut away the white. I would love to have additional symbols and rhythm notes. Thank you for being so generous with your time and talents. My students love your games!
Susan, your instructions are great, and I plan to make one of these boards. I actually found some music staves on laminated poster board at a teacher supply store – I believe they were under $5. I use them on the floor, and the student and I sit on the floor to draw on them using whiteboard markers. I sometimes clip it to my plain white board. But I love the idea of having a real board that can be put on an easel. Also, if the student doesn’t have to draw the symbol, you can get more practice at knowing other things, rather than just practicing the drawing half the time. Kudos! And, yes!!! I would love to have bar lines, time sigs, repeat sign, fermata, and rhythm groups (such as 2 8ths,2 and 4 16ths, dotted 8th + 16th, 8ths and 16th triplets. Thank you!
This looks like a fun project for my smaller white board! I might check out the printable magnetic sheets to copy on and carefully cut out the symbols (instead of laminating – since I don’t have a laminator). Also – if someone has a Cricut – that might be a way to make the symbols on the magnetic paper (just thinking outloud here). I have seen some black magnets at the office supply stores that might work as notes so that my students can create their own songs, and where we can play fun games! Thanks Susan, you got the musical wheels turning in my head this morning — love it! Thank you for generously sharing on your site to help all of us out here teaching and “coming alongside” our students – you are a tremendous help to us all.